
Most developers have at least tried developing with an AI coding agent, but not many have built their own. In this post we’re going to have a look at how to build a simple coding agent using Langflow and a couple of MCP servers.
What we’re building
Coding agents can start quite simple. You need to connect user input to a model that has access to tools that can use the file system to create files and understand the project structure, and write and edit those files. This is the flow we’re going to build that can autonomously code for you.
What you will need
To build your own coding agent with Langflow, you will need to have Langflow installed. You can either download Langflow Desktop or use one of the other installation methods.
You will also need Node.js installed so that Langflow can run npx commands to start MCP servers.
An API key for an LLM service, you can use models from OpenAI, Anthropic, Google or any other provider you want. I will use OpenAI in this post, but you can use your own model, or even extend this application and combine multiple models.
Let's get building
Start by creating a directory in which you want your agent to work. This is to give it a safe place in which to work without giving it access to the rest of your file system (we don't want our agent to decide that rm -rf ./ is a good idea and be able to carry out the plan). Note down the full path for this directory.
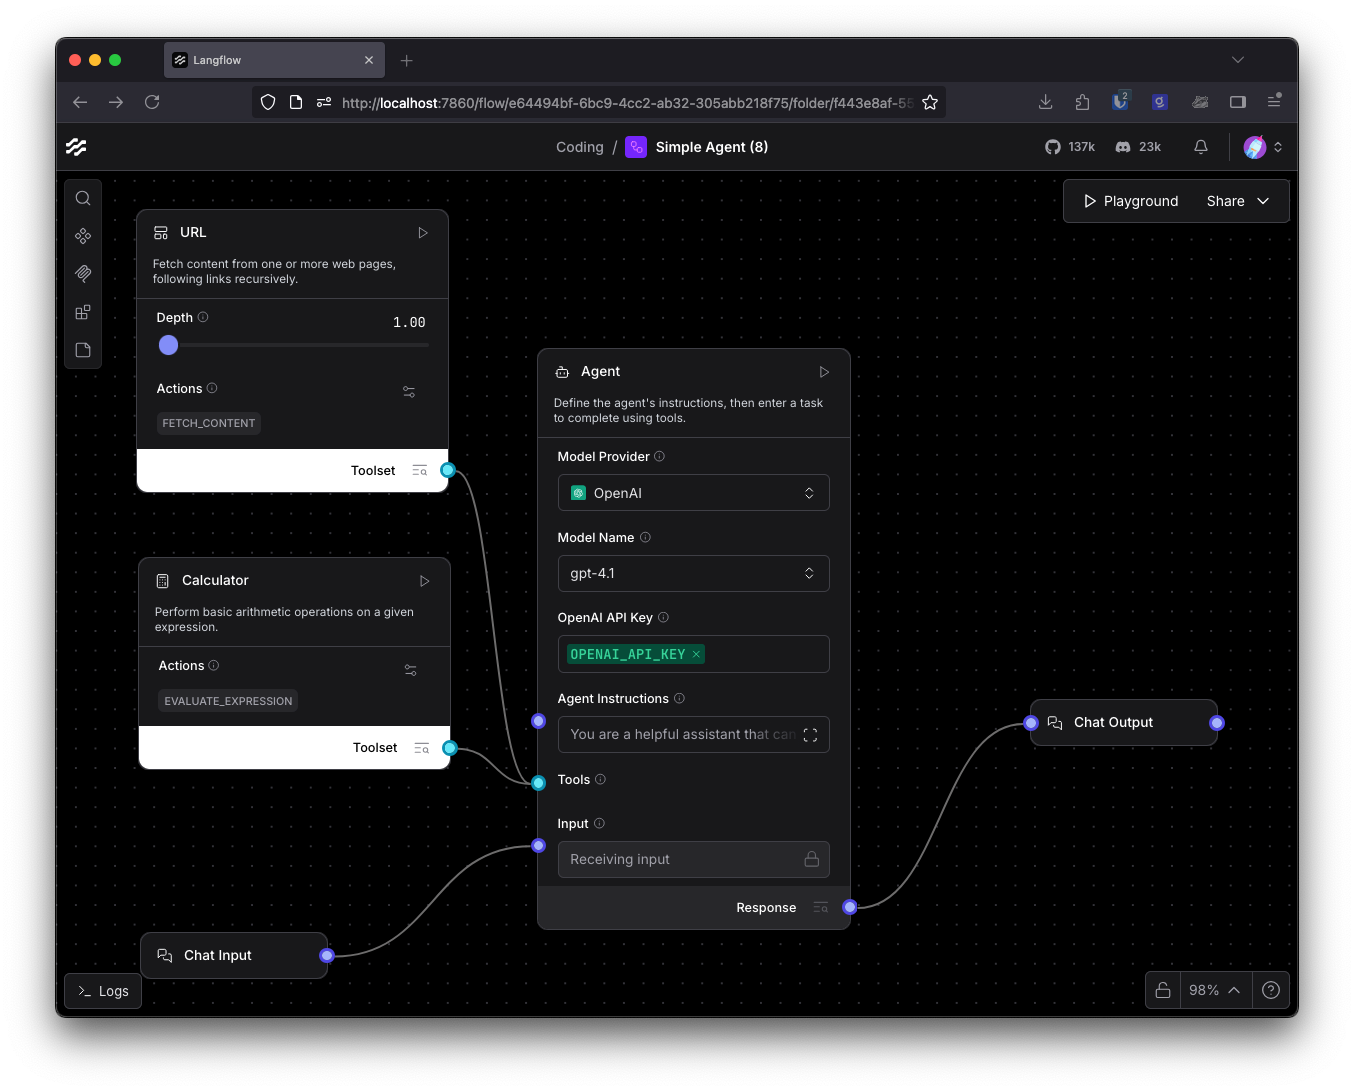
Open up Langflow and let’s build our agent. Create a new flow and choose the Simple Agent template This creates a flow with a chat input, an agent with calculator and URL tools, and a chat output.
Choose the model you want to use for this. The default is OpenAI, but you can pick Anthropic or Google from the Model Provider drop down. You can also choose to Connect other models which lets you pick any other model provider, or local models using Ollama or LM Studio, from the sidebar and connect it to the Language Model input. Make sure you have your API key stored in the component for any remote providers. Don’t forget, it’s easy to switch provider later if you change your mind.
One piece of config you might want to change is the maximum number of attempts your agent can make to complete its task before it stops. This is the Max Iterations setting in the extended config for the agent component. By default this is 15, but coding can be a long horizon task that requires more iterations, so you can increase this if you need to.
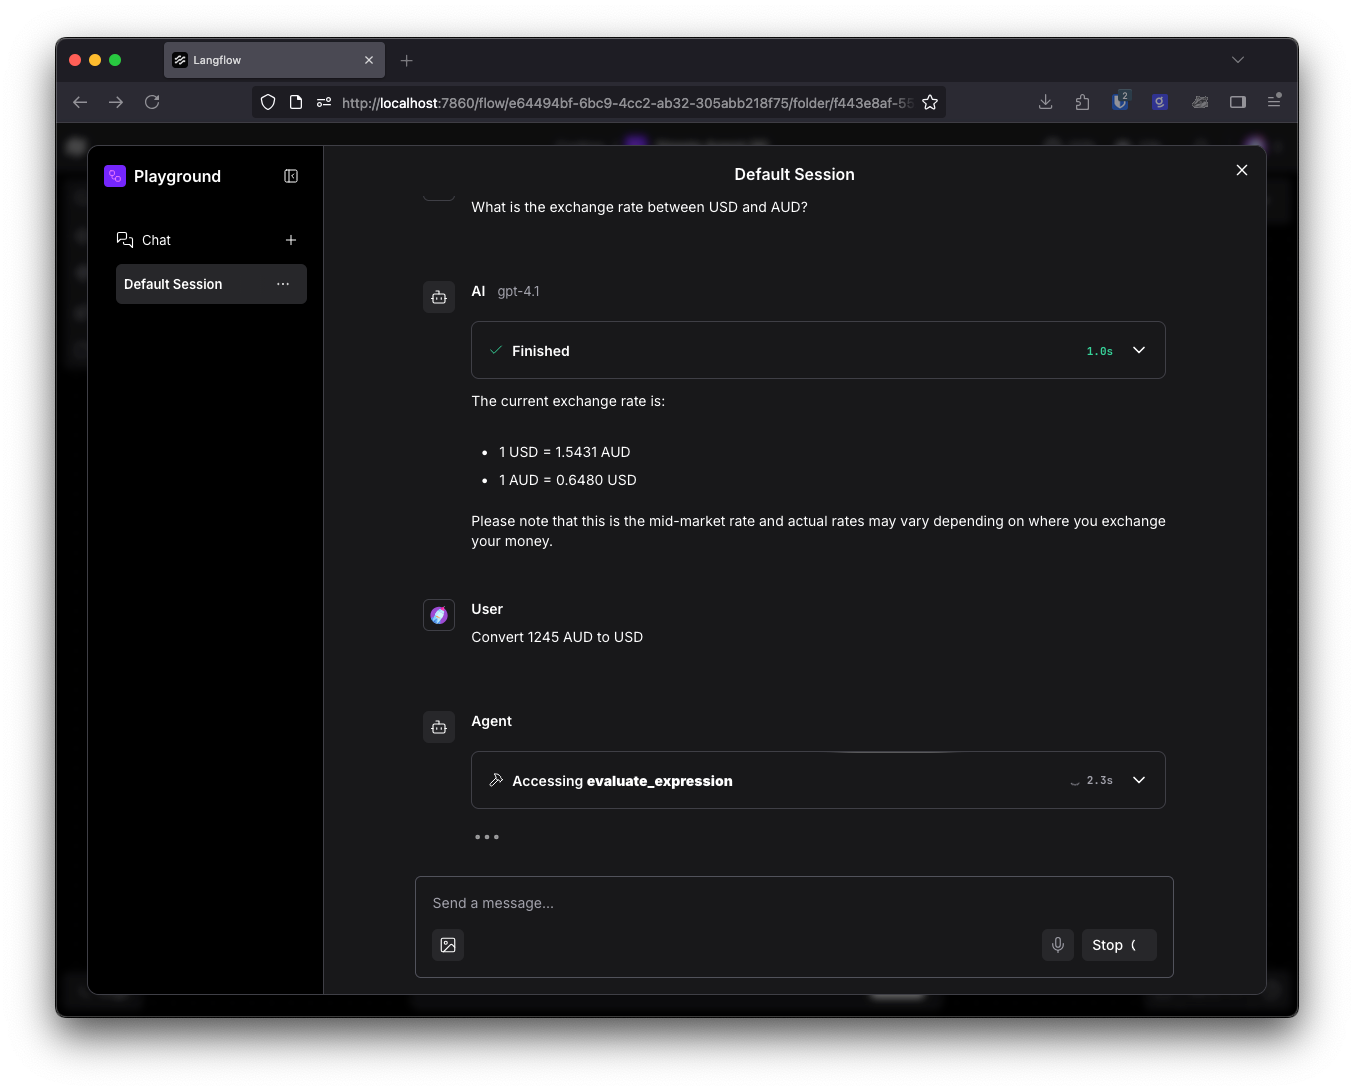
This is a good time to make sure your setup is all working. Open the Playground and ask the agent something simple that it can look up on the internet or use a calculator for. I like to check foreign exchange rates.
The agent is working, but it’s not much use as a coding agent yet. We probably don’t need the URL or calculator tools for this agent, so you can delete those. Let’s add some tools that will be helpful.
MCP Servers
A coding agent needs access to the file system, so that it can read and write to files in the project. It would also be useful to connect it to some documentation so that it can learn about the tools it is using in the project. We could write custom components to handle this, or we could rely on the phenomenal community of builders and the MCP servers they have created. Langflow can act as an MCP client (as well as an MCP server) so let’s add some MCP servers to help our agent out.
Filesystem
One of the reference projects from the MCP team is the Filesystem MCP. We can add this MCP server to Langflow to give our agent access to our filesystem.
In Langflow, open the MCP sidebar and click Add MCP Server at the bottom of the page. Here you can paste in a JSON description of an MCP server and the settings will be automatically populated. For the filesystem, you can use this JSON:
{
  "mcpServers": {
    "filesystem": {
      "command": "npx",
      "args": [
        "-y",
        "@modelcontextprotocol/server-filesystem",
        "/path/to/your/project/directory"
      ]
    }
  }
}
Make sure you fill in the correct path to your project so that the agent can work safely in just that directory. Once the MCP server has been configured it appears in the sidebar, drag it onto the canvas and enable Tool Mode. Then connect the Toolset output to the agent component’s Tools input.
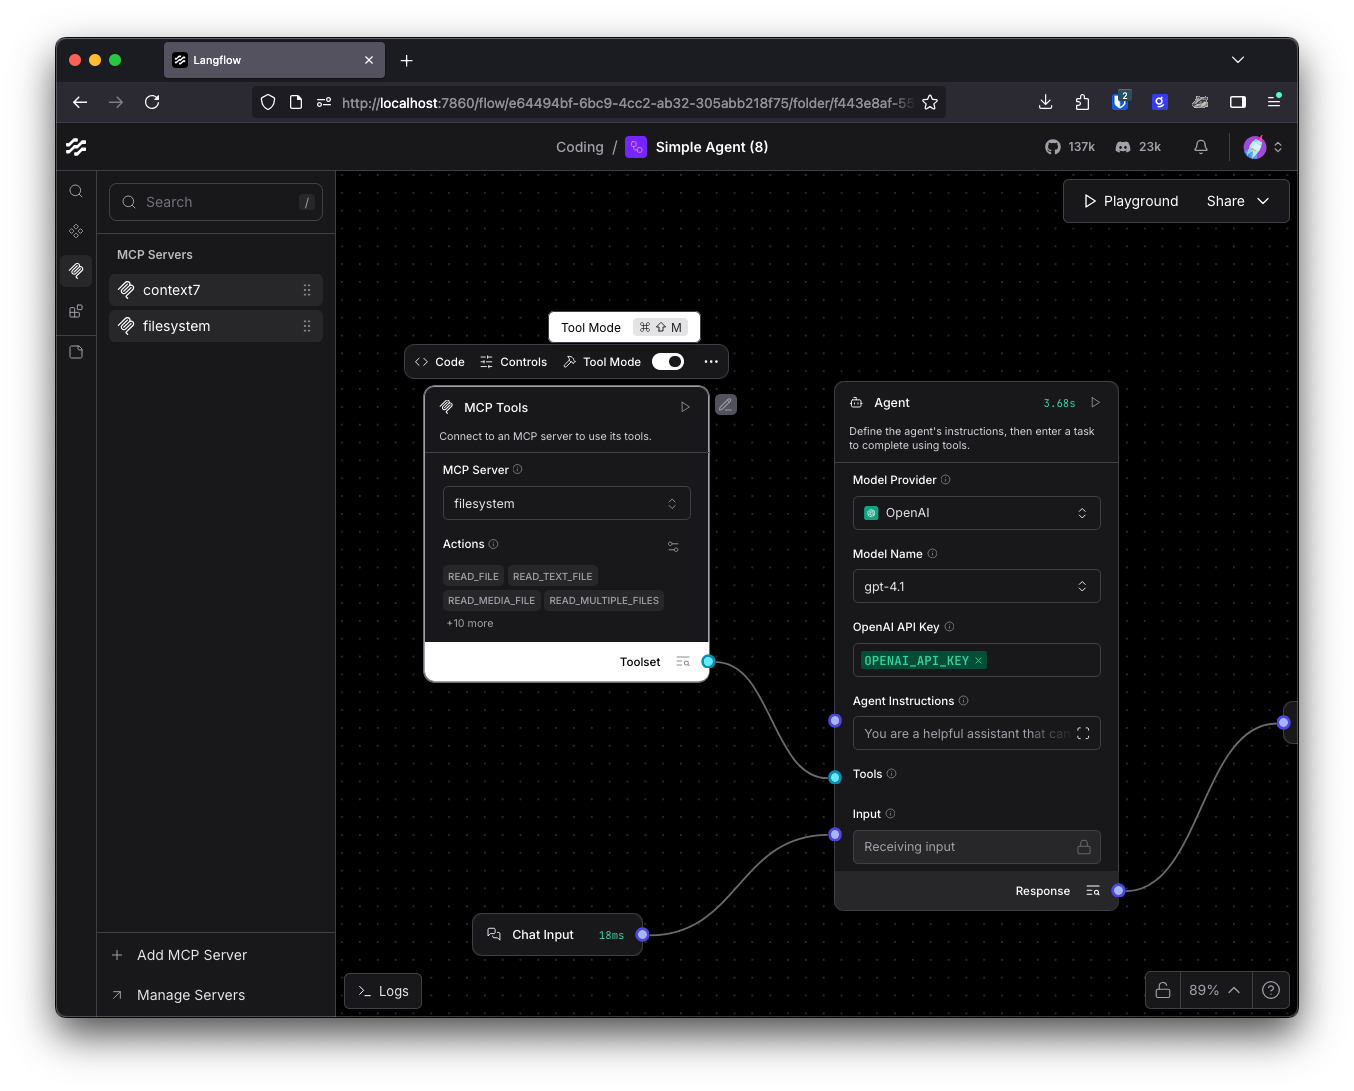
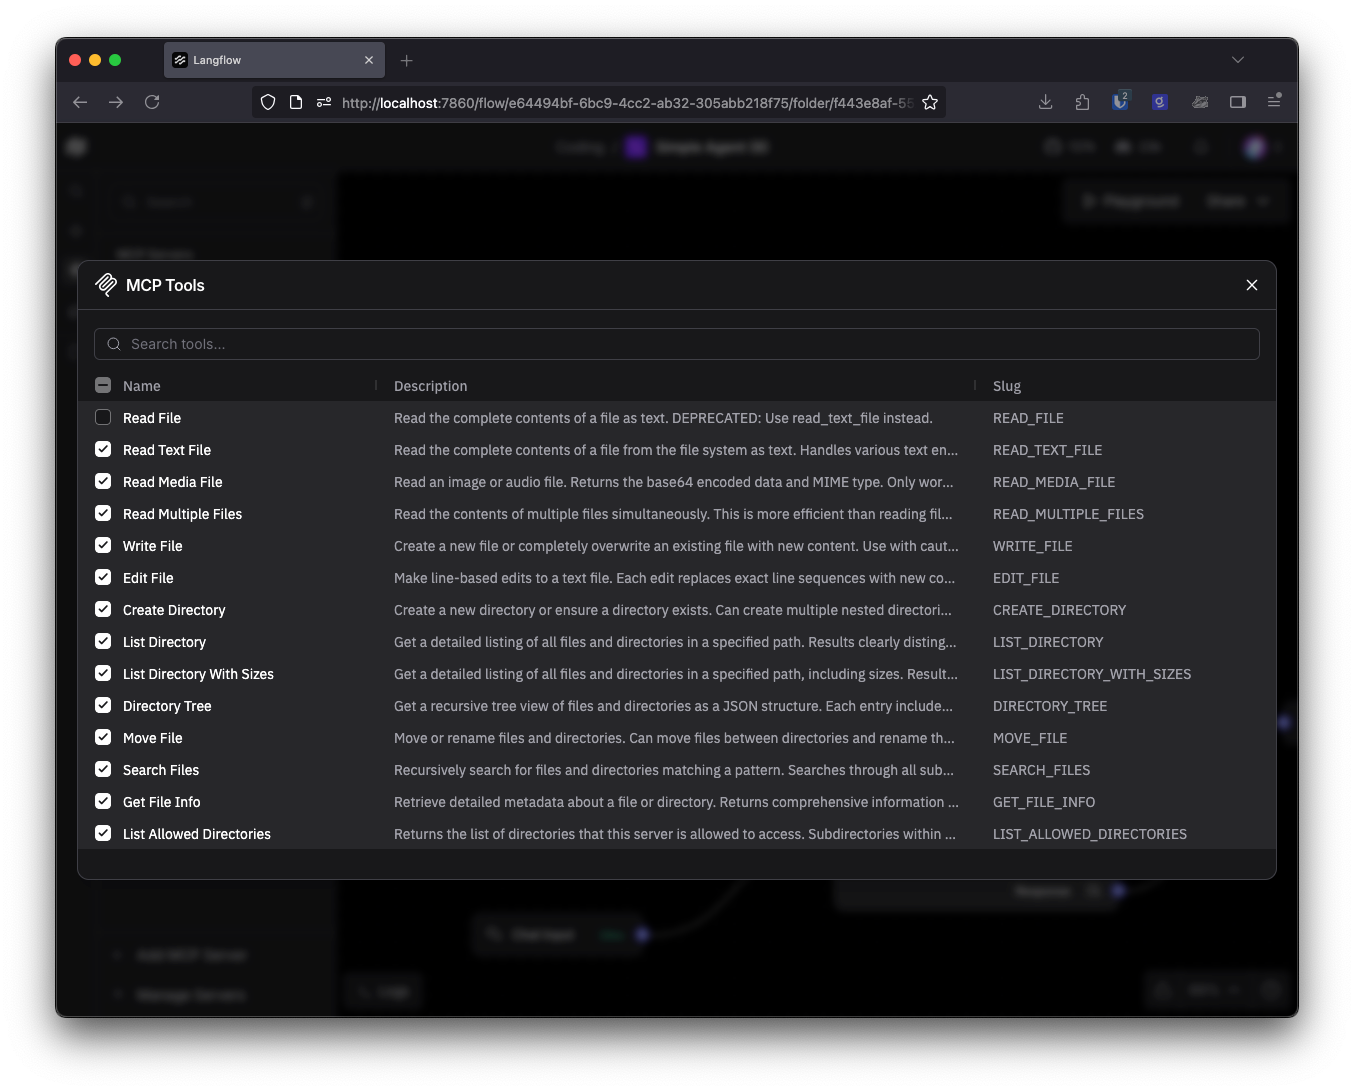
You can edit the actions that an agent can take by clicking on the config icon in the MCP component. You should do this for the filesystem MCP server because there is one deprecated tool, the Read File tool. You can deselect that tool and the agent will not have access to it. It will use the newer Read Text File tool instead.
Documentation
Large language models (LLMs) are trained on a lot of code, but some of that code is old or outdated. For example, I am writing this only a few weeks after Next.js 16 was released. The training data for most LLMs is likely to contain a lot of detail on Next.js 15, or even earlier versions. Giving a coding agent access to up-to-date documentation helps to keep it on track. It is effectively a retrieval augmented generation (RAG) process for your agent to help it write better code.
One way to do that is with Context7, an application that makes it easy to search and retrieve documentation for open source libraries in model friendly formats. To use Context7 you do need to sign up and generate an API key. Once you’ve done that, you can add the Context7 MCP server with the same process as above. Click on Add MCP Server and enter the following JSON:
{
  "mcpServers": {
    "context7": {
      "command": "npx",
      "args": ["-y", "@upstash/context7-mcp", "--api-key", "YOUR_API_KEY"]
    }
  }
}
Make sure you enter your own API key. Drag the component onto your canvas, turn on Tool Mode and connect it to your agent.
If you have other MCP servers that you want to use to make the agent even better at building applications, say the Chrome Devtools MCP server, or any of the tools available on the GitHub MCP server registry, then you can add them with the same process. Remember not to overwhelm your agent with too many tools though.
We’re nearly ready to start writing code.
Context Engineering
In context engineering, the idea is to set up an agent with everything it needs to guide itself and perform the actions that you want. This means we provide the tools with their descriptions to the agent so that it knows what it can use, as well as setting the system prompt to guide the way it works.
You can set your system prompt by entering it in the Agent Instructions field on the agent component. I would start with something relatively simple and adjust as you test your agent. The power of building your own coding agent is that you can decide how you want it to act, so I will leave writing the prompt for you. But you might get some inspiration from the Gemini CLI system prompt or OpenAI’s Codex CLI system prompt which are both open-source. I did find it useful to include the directory in which the agent is allowed to work in the prompt, it saves the agent wasting tokens and tool calls to work out the directory it has permission to use.
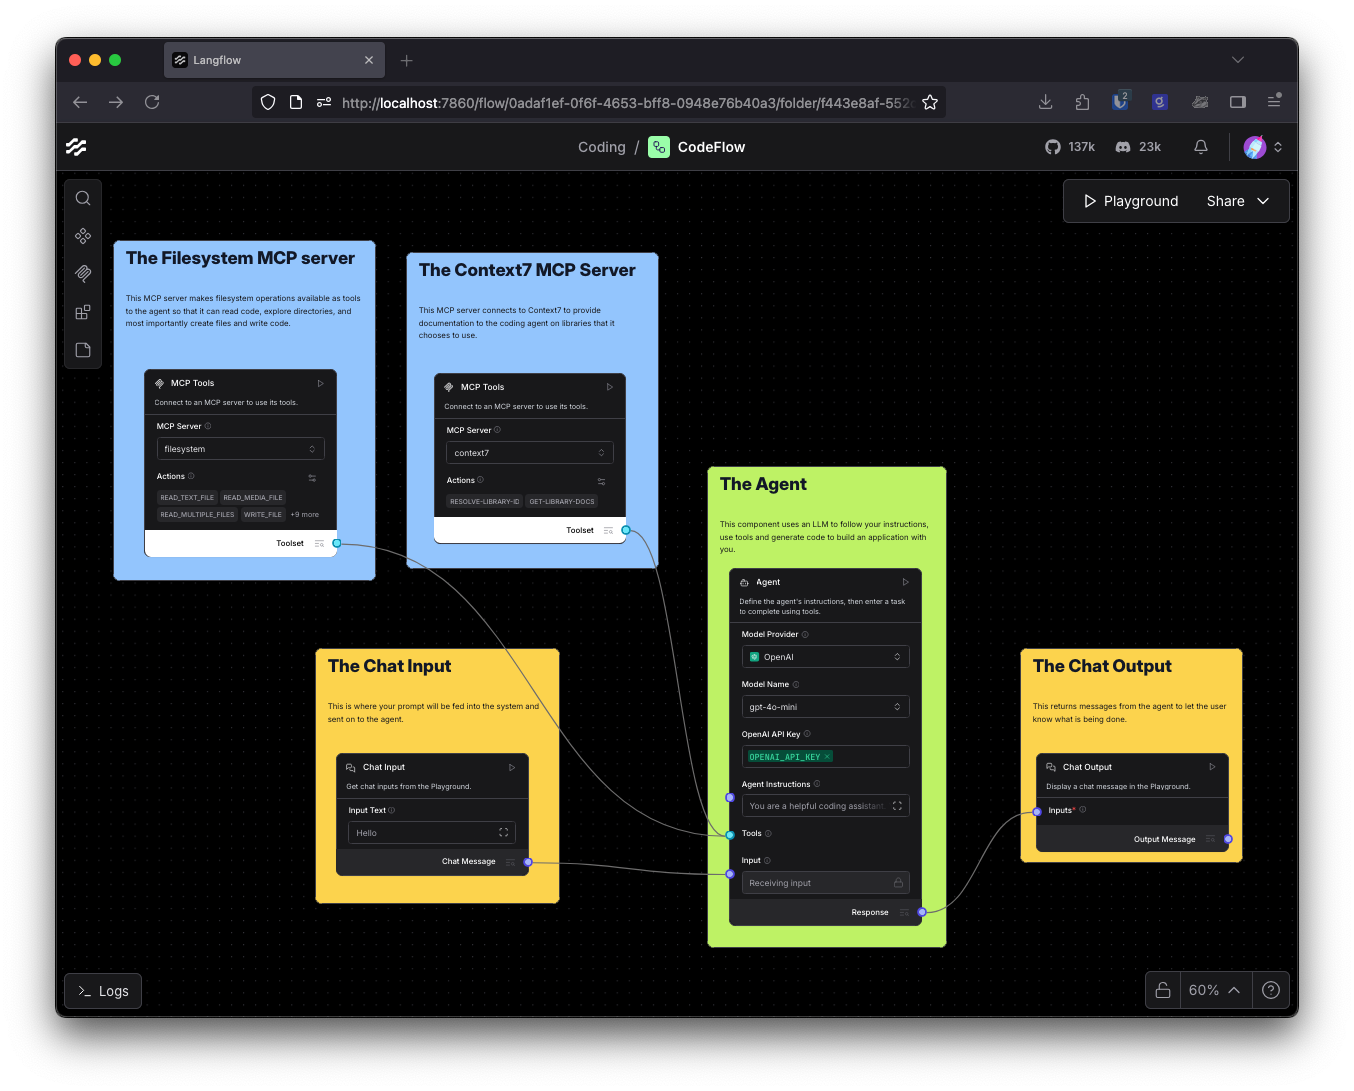
Now your flow is complete, it should look a bit like this:
Running your agent
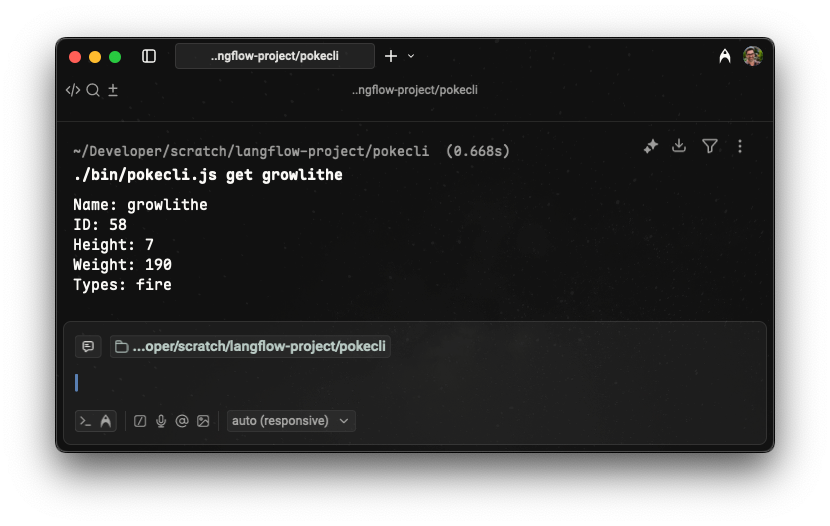
With your tools set and your system prompt written it’s time to try out your agent. Open the Playground and start directing the agent to code. The first thing I asked was for it to create me a Pokémon CLI, and I was delighted to see it one-shotted the task successfully.
This is just the start
This basic coding agent is already capable of fairly incredible things. You could extend it to do much more, including:
- Guiding it to pay attention to AGENTS.md files
- Providing more tools, for example access to the command line to run tests
- Setting up a method of making to-do lists and checking them off as part of the process
- Equipping the main agent with sub-agents that are prompted to be experts in different areas, like front-end development, database design, etc
If you want to try this out without building it yourself, you can download this coding agent flow and import it to your Langflow instance.
You can also build many other types of agent with Langflow, like a deep research agent, voice call powered agents with Twilio, or multimodal agents like this alt text generator.
If you give this a go let us know on X at @langflow_ai, on LinkedIn, or join our Discord. We can’t wait to see what you build.


