
Once you've built your flows and agents in Langflow, you need to integrate them into your own application. You can do so using the Langflow API.
In Node.js applications, you can construct and make calls directly to the API with fetch, the http module, or using your favourite HTTP client like axios or got. To make it easier, you can now use this JavaScript Langflow client. Let's take a look at how it works.
What you'll need
To test the client out, you’ll either need to download the desktop version of Langflow or install Langflow with one of the other methods. Once you are set up with Langflow, make sure you have a flow to test the API out with. The basic prompting flow template is a good start, or, if you're looking for something with a bit more agency, check out the simple agent template. You'll need an OpenAI API key to run these flows, or you can change out the model provider if you want to. Make sure the flow works with a test in the playground; once it’s responding, you’re ready to make calls to the API.
Note: this Langflow client is for using on the server. The Langflow API uses API keys, which should not be exposed, so it isn’t suitable for using directly from the front-end.
Getting started with the JavaScript Langflow client
To demonstrate how to use the Langflow client, let's start a small TypeScript application. Create a new directory, change into it, and initialize a new Node.js project:
mkdir using-langflow-client
cd using-langflow-client
npm init --yes
Install the client using your favourite package manager:
npm install @datastax/langflow-client
Install some other tools that will help us write and run the application:
npm install tsx @types/node --save-dev
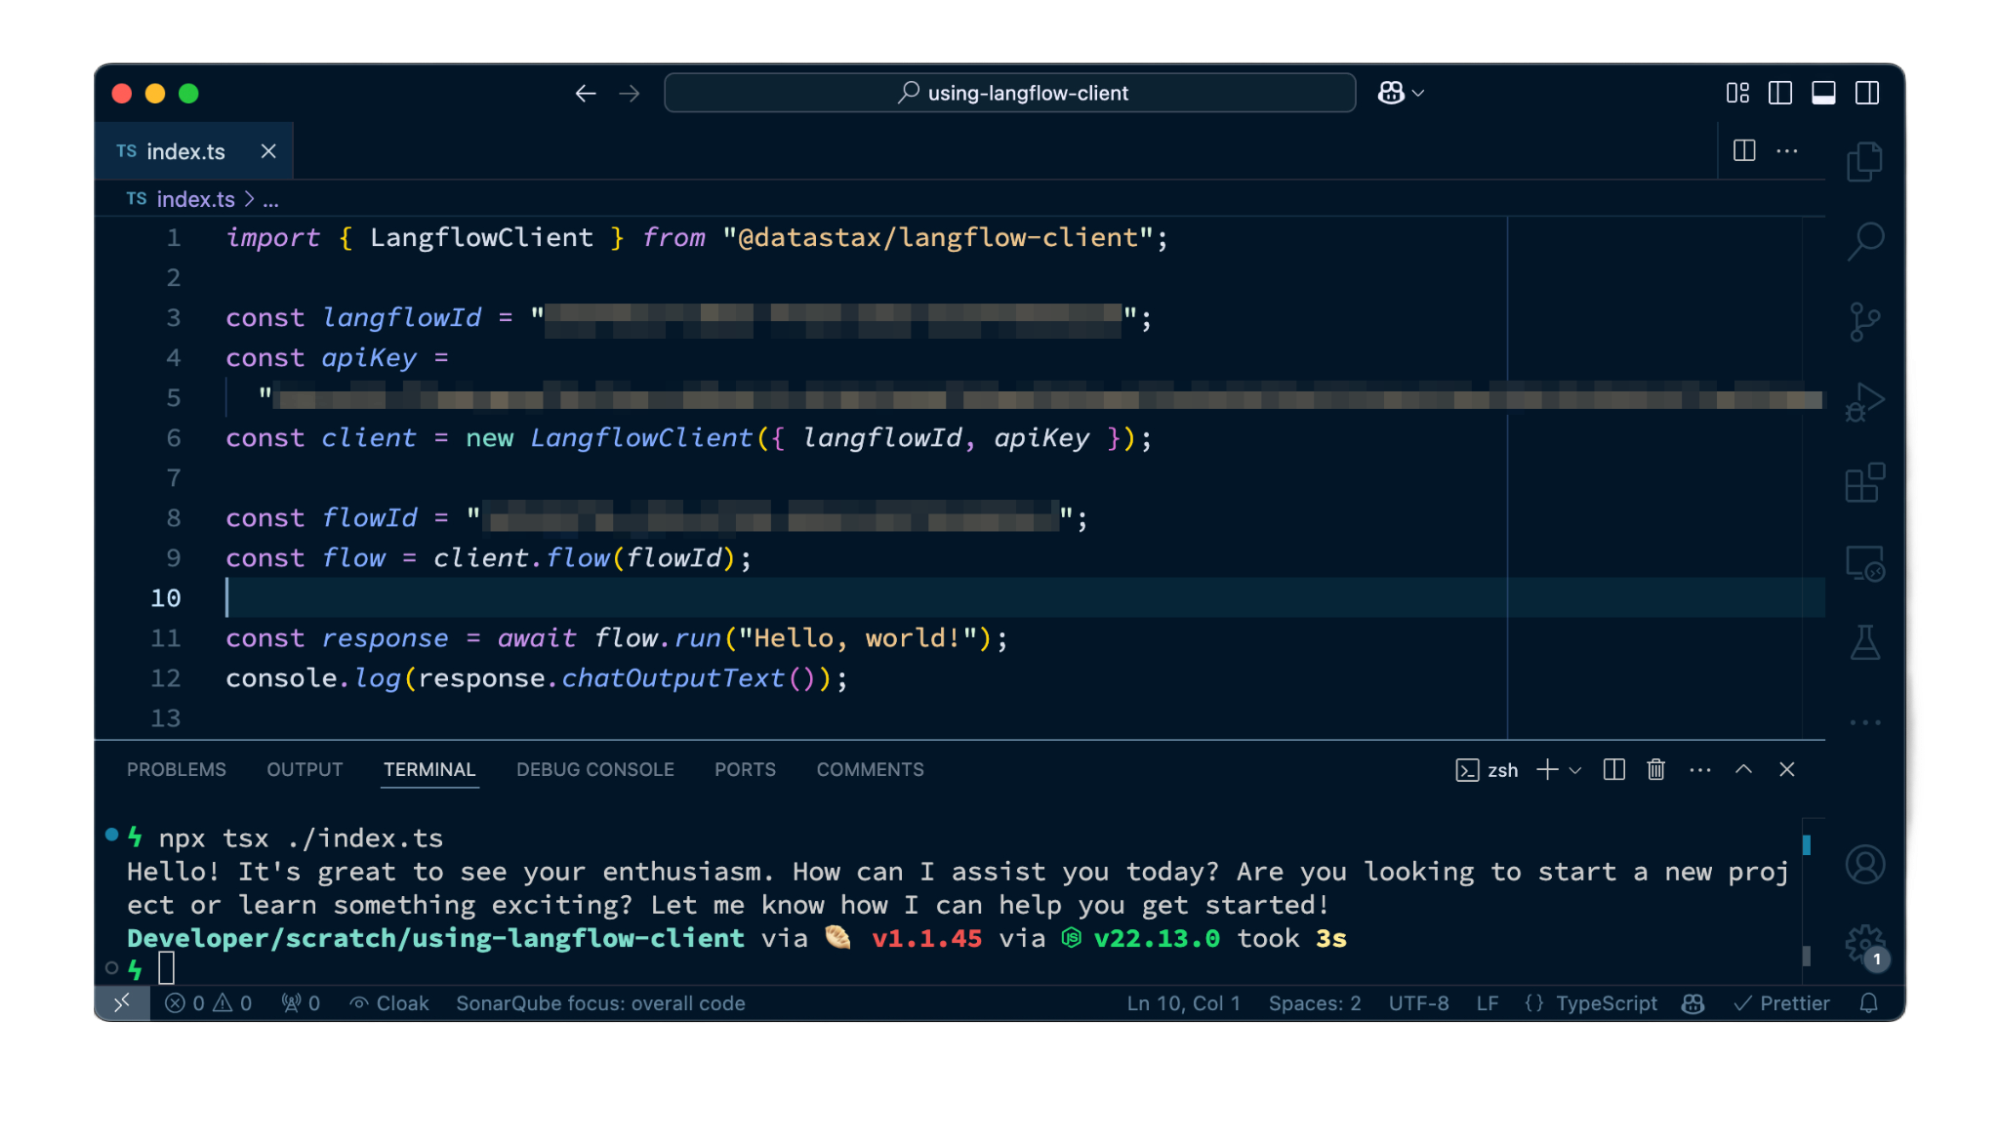
Create a new file called index.ts and open it in your editor of choice. Start by importing the client.
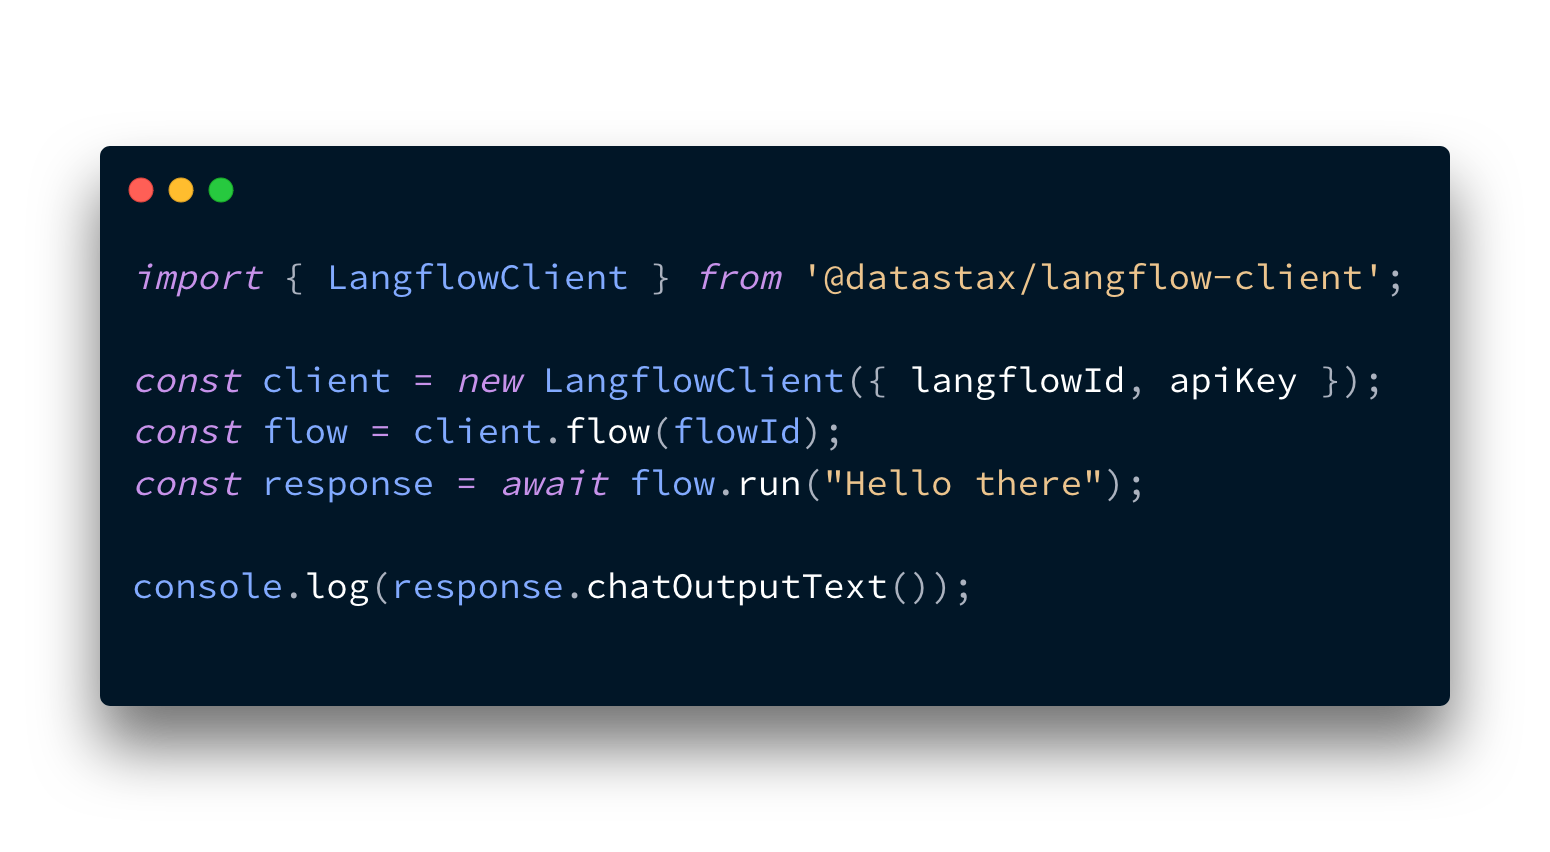
import { LangflowClient } from "@datastax/langflow-client"
Now you can initialize a client to use with the Langflow API. You will need the URL from which you access Langflow. By default, the URL is http://localhost:7860, but if you are hosting Langflow somewhere else then you will need to get the URL from there.
If you have set up authentication for your instance of Langflow, you’ll need to create an API key for your user. If you haven't yet set up authentication for your instance of Langflow, you can omit the API key.
You can then initialize the client like this:
const baseURL = "http://localhost:7860";
const apiKey = "YOUR_API_KEY";
const client = new LangflowClient({ baseURL, apiKey });
Running a flow
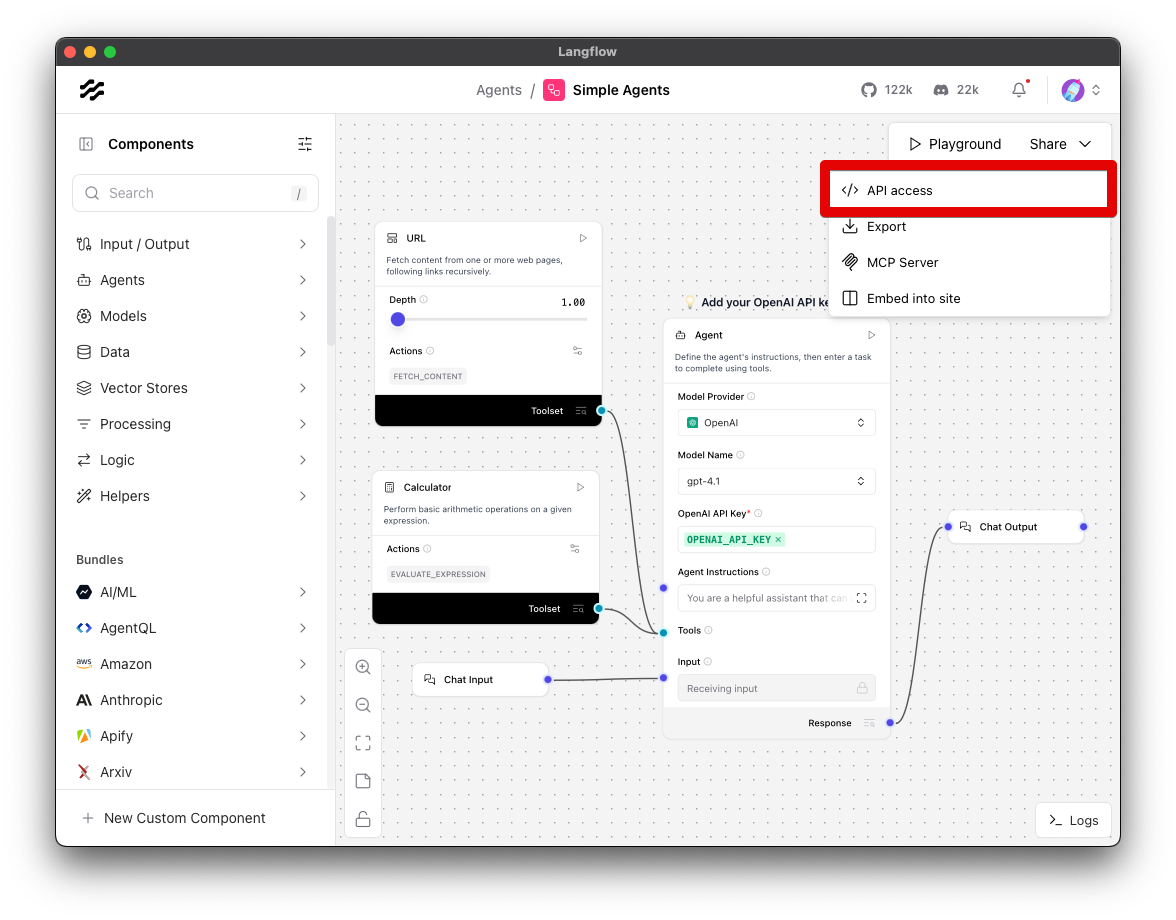
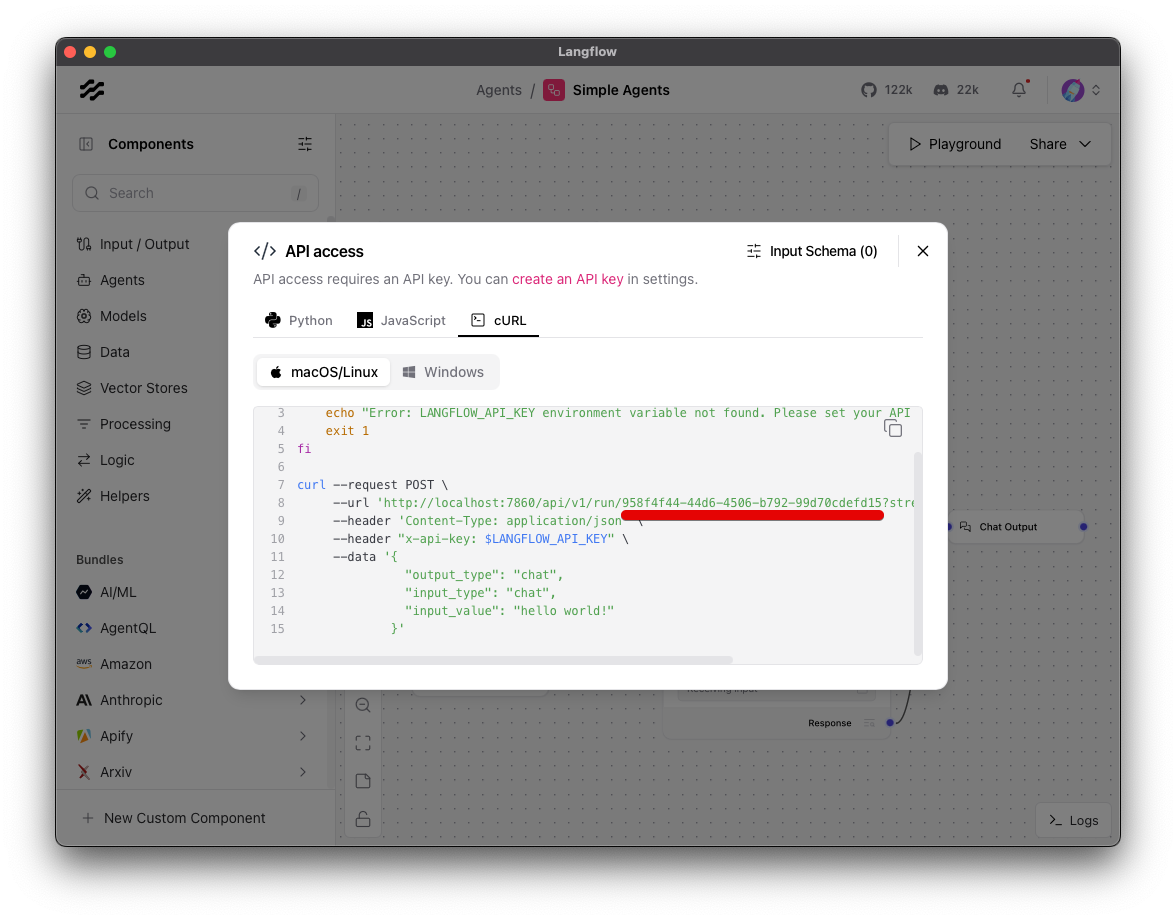
Now you can use it to run your flows. To do so, you’ll need the flow ID, which can be found in the API modal in the flow canvas.
You can get a reference to a flow by calling on the client like so:
const flowId = "YOUR_FLOW_ID";
const flow = client.flow(flowId);
You can run the flow by calling run and passing it the input to your flow:
const response = await flow.run("Hello, how are you?");
console.log(response.outputs);
If you run the application now, your flow will run and output your results.
npx tsx ./index.ts
Flow responses
Flows return a lot of data: everything you could want to know about how the flow ran. The most important part of the response is the output from the flow; the Langflow client tries to make this easy.
You can take the flow response from above and instead of logging the entire set of response outputs, you can call:
const response = await flow.run("Hello, how are you?");
console.log(response.chatOutputText());
The client will return the text from the first chat output component in the response.
If you need the session ID, or more detail from any of the outputs, you can access the full response from the FlowResponse object:
const response = await flow.run("Hello, how are you?");
console.log(response.sessionId);
console.log(response.outputs);
Options for running a flow
Using flow.run(input) will run your flow with several defaults. The input and output types will be set to chat and it’ll use the default session. If your flow requires different settings, you can update the parameters. For example, if you want to set the input and output types to text and pass a session ID, you can do the following:
import { InputTypes, OutputTypes } from
"@datastax/langflow-client/consts";

// set up flow as above

const response = await flow.run("Hello, how are you?", {
  input_type: InputTypes.TEXT,
  output_type: OutputTypes.TEXT,
  session_id: "USER_SESSION_ID",
});
Tweaks
Langflow is flexible enough to enable you to change the settings for any of the components in a flow. For example, you might have set up the flow to use the OpenAI model component using the gpt-4o-mini model, but you want to test the flow with gpt-4o. Instead of updating the flow itself, you can send a tweak by providing the ID of the component and the parameters you want to override.
The JavaScript Langflow client supports tweaks in a couple of ways.
You can add a tweak to a flow object, like so:
const flow = client.flow(flowId);
const tweakedFlow = flow.tweak("OpenAIModel-KqkTB", { model_name: "gpt-4o" });
This creates a new flow object, so if you call run on the original flow object it will use the original model and if you call run on the tweakedFlow object it will use gpt-4o.
You can also provide your tweaks as an object when you run the flow.
const tweaks = { "OpenAIModel-KqkTB": { "model_name": "gpt-4o" }};
const response = await flow.run("Hello, how are you?", { tweaks });
Let's make this better together
This is the first release of this Langflow client and we want it to be the easiest way for you to use Langflow in your JavaScript server-side applications. The code is open-source and available on GitHub.
If you have feedback, suggestions, or you want to contribute, please do so over on GitHub. And if you like the library, please leave a star on the GitHub repo.


